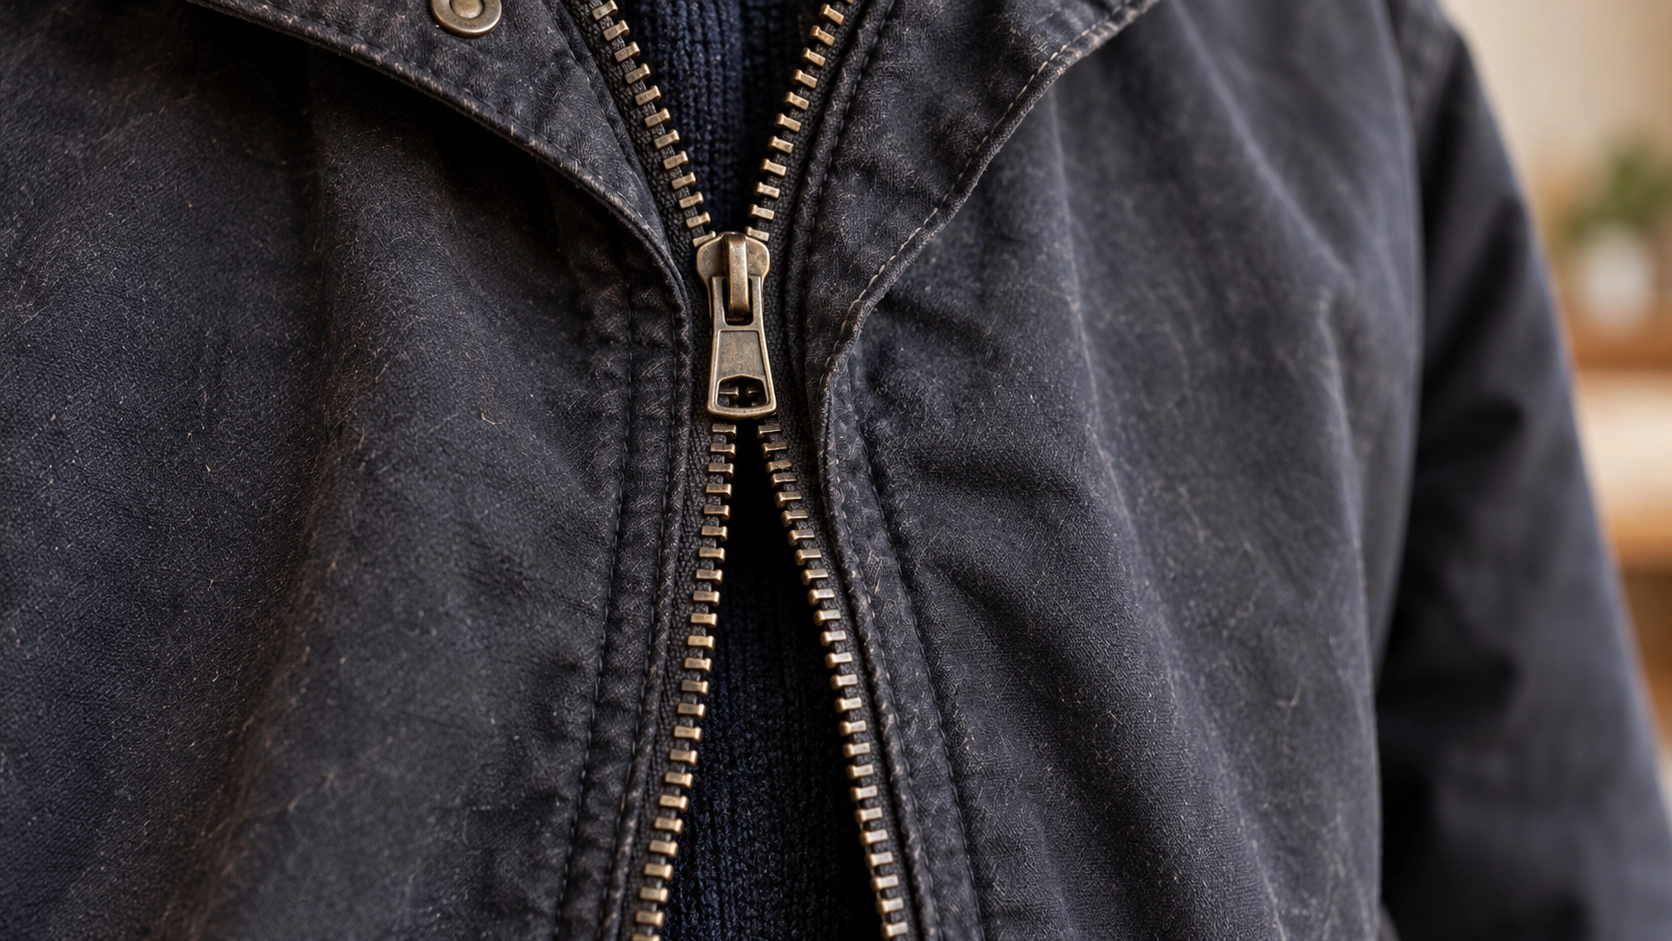
A jacket zip has a fairly limited job description. Join two sides of a garment, stay where it has been put, and open again when asked. There is not much room for creative interpretation.
And yet you can fasten a jacket, walk halfway down the street and discover that the front has opened again. Pull it back up, carry on, and it does exactly the same thing. Eventually you start travelling with one hand permanently stationed near your chest, monitoring a fastening that apparently cannot be left unsupervised.
Before reaching for pliers or deciding the entire zip needs replacing, watch what actually moves.
There are two failures that feel almost identical when you’re wearing the jacket. Sometimes the teeth separate below the slider, even though the slider has stayed in position. Sometimes the teeth remain joined, but the slider itself creeps down and opens them as it goes.
The slider is the small metal or plastic component that travels along the zip, guiding the two rows of teeth together or apart. The piece you grip is the pull tab. The distinction between the two failures matters because a slider that no longer grips the teeth properly is a different problem from one whose locking mechanism is failing.
One may need a small adjustment. The other might need nothing more complicated than pressing the pull tab down.
First, find out what the zip is actually doing
Lay the jacket flat, fasten it carefully and watch what happens as you operate the zip. Look at the entire length, including the bottom where the two halves meet.
| What happens | Likely fault | What to do first |
|---|---|---|
| The teeth separate below a slider that stays put | Loose or worn slider; possibly damaged teeth | Inspect the teeth before adjusting anything |
| The slider gradually moves down | Unlocked, non-locking or faulty locking slider | Press the pull tab flat and test again |
| The slider catches halfway | Trapped lining, loose thread or dirt | Release the obstruction gently |
| Teeth are missing, bent or broken | Damaged zip chain | Ask about replacement |
| The slider comes off at the top | Missing or damaged top stop | Have the stop replaced securely |
| The zip refuses to engage at the bottom | Insertion problem or damaged bottom fittings | Check alignment and inspect the fittings |
These are starting points, rather than guaranteed diagnoses. A jacket may have more than one fault, particularly if somebody has spent months yanking at a stubborn fastening.
When the teeth separate behind the slider
This is the peculiar one. You pull the zip upwards, apparently closing the jacket, but the teeth open again somewhere below. The slider may be sitting quite happily near your chin while the two sides of the jacket part company further down.
The first thing to inspect is the teeth themselves.
Run your eyes along both sides of the open zip. Look for gaps, missing pieces, bent teeth or sections that no longer sit in line with their neighbours. Check the fabric tape holding them as well. If that is torn or pulling away from the teeth, tightening the slider will not repair it.
Some zips have individual metal teeth, others have moulded plastic teeth, while a coil zip uses a continuous spiral of synthetic material as its interlocking element. These constructions need different replacement components, so identifying the type matters before attempting a repair.
If the teeth and tape are intact, the slider becomes a more promising suspect.
Inside it is a narrow passage that brings the two sides of the zip together. Over time, a metal slider can loosen or become distorted enough that it no longer guides the teeth into proper engagement.
Patagonia and iFixit’s zip-diagnosis guide identifies this as a common cause of separation on moulded plastic-tooth zips. It also makes a distinction worth remembering: a loose slider allows the teeth to separate, while one that has been compressed too far becomes difficult to move.
Can you tighten it yourself?
Possibly, but this is where restraint becomes more useful than enthusiasm.
In Threads, sewing specialist Katrina Walker describes using ordinary or flat-nose pliers to gently tighten a loosened slider. Her method applies slight pressure to the slider opening on both sides, followed by testing.
If you have identified a loose metal slider, its opening is accessible and you are comfortable handling the tool, the cautious approach is:
- Examine the slider first. Do not attempt to adjust a cracked body, an unfamiliar plastic slider or one whose shape and working parts you cannot distinguish.
- Using suitable pliers, apply the smallest controlled squeeze to the sides of the opening, without twisting or crushing the whole slider.
- Test the fastening gently. If it moves less freely, binds or feels worse, stop.
Walker warns that squeezing too hard can break the slider or compress it so much that the zip will no longer move. It is quite possible to turn a small repair into a larger one by deciding that a second, much firmer squeeze will surely finish the job.
A replacement slider fitted by somebody who knows what they’re doing is a considerably better outcome than a crushed one.
When the slider itself keeps travelling down
Before replacing anything, fasten the jacket and press the pull tab flat against it. Then let go and see whether the slider holds.
This is the free check, and it deserves to come before the tools.
According to YKK’s explanation of zip locking mechanisms, some sliders contain a small locking pin that catches on the teeth when the pull tab is lowered. Lifting the tab releases the pin and lets the zip move again.
YKK calls this a semi-automatic locking action. Other sliders have an automatic lock that engages when you release the pull. Non-locking sliders have no such mechanism.
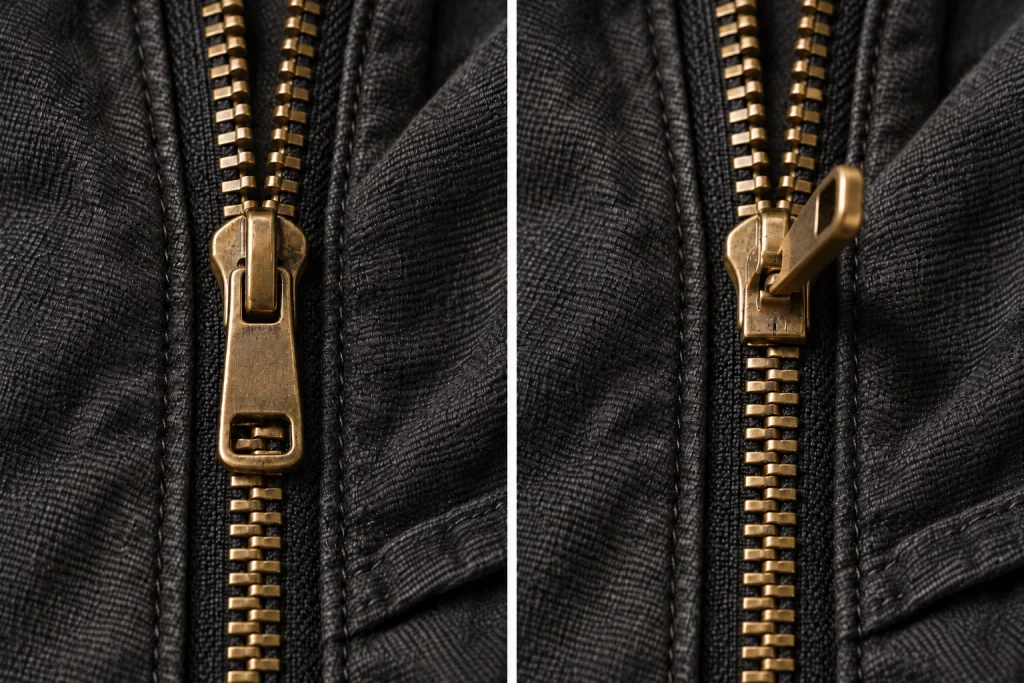
On a zip designed to lock with the tab lowered, leaving the pull sticking out can allow the slider to move. Pressing it down may solve the problem immediately, with no damaged components to repair.
Test the jacket with the pull lowered and your hands away from it. Do not yank the two sides apart to prove a point. You are checking whether the fastening holds under normal, gentle movement.
If it stays put, wear the jacket normally and pay attention to what happens when you sit, bend or move your arms. YKK also notes that surrounding fabric can sometimes lift a pull tab and release its lock during wear. A slight change in where the slider finishes may keep the fabric from catching it.
If the slider still creeps down, the next question is whether it was designed to lock at all.
A non-locking slider behaving like a non-locking slider is not necessarily broken, although it may be unsuitable for the job you’re asking it to do. A slider that originally locked and no longer does is a different matter.
At that point I would ask an alterations shop about fitting a correctly matched locking slider. Squeezing the body with pliers to cure a failed lock is the wrong repair for the symptom.
When the zip catches halfway
A jammed zip can be alarming because the obvious response is to pull harder, and the obvious response is frequently a terrible idea.
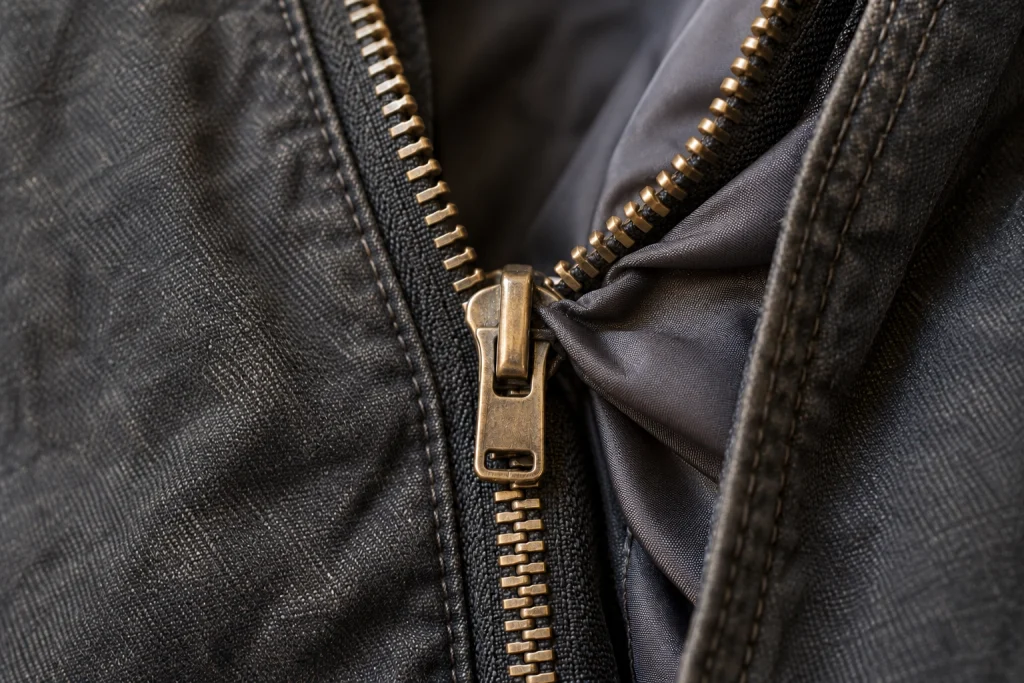
Jacket linings are particularly good at wandering into places where they have no business being. A small fold catches beside the teeth, the slider grips it, and suddenly the fastening refuses to move in either direction.
Stop pulling.
Take the jacket off if necessary and examine both sides of the mechanism. If fabric is trapped, ease the slider backwards slightly, only as far as it moves freely, while gently drawing the caught material away.
Do not pull the lining against a firmly stuck slider. If the cloth will not release without force, hand it to a repairer before the zip acquires a torn lining as a companion problem.
Sometimes the obstruction is smaller: loose thread, accumulated fluff or dirt around the teeth. A soft brush can remove visible debris. Clean more thoroughly only in a way suitable for the garment’s fabric and care instructions.
There is disagreement about lubricating stubborn zips. Katrina Walker discusses several options in Threads, while Patagonia’s repair guidance specifically advises against lubrication and recommends removing obstructions and cleaning instead.
For an ordinary lined jacket, I would begin with Patagonia’s approach. There is little attraction in solving one problem by introducing an oily substance close to an otherwise perfectly respectable piece of clothing.
If the zip is clean, the fabric is clear and the slider still catches at exactly the same point, inspect the teeth there. Persistent resistance may indicate damage that cleaning cannot resolve.
A lining damaged in the process is its own repair decision; I’ve covered that separately in When Is a Split Coat Lining Actually Worth Repairing?.
When the zip won’t start — or the slider comes off
The ends of a jacket zip are easy to overlook, partly because the components are small and partly because we tend to think of the teeth as the entire fastening.
An ordinary jacket uses a separating zip, meaning the two sides can come completely apart.
At the lower end, the insertion pin is the narrow reinforced piece on one side that you feed through the slider to start fastening. It must enter the retaining box, the fitting at the base of the opposite side that receives the pin and holds the two halves in their starting position.
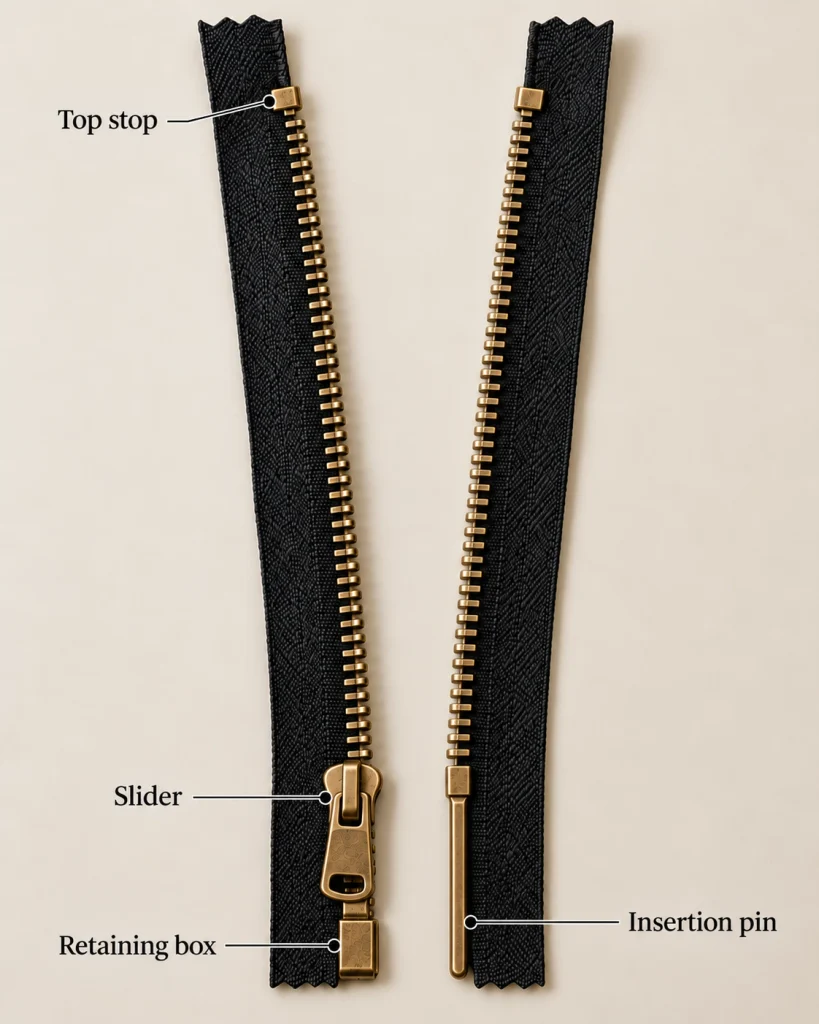
If the pin has not been inserted fully, the teeth may engage badly or the zip may refuse to start.
Bring the slider all the way down, line up the two sides and insert the pin fully into the box before drawing the slider upwards. Hold the bottom steady and do not force it if the parts refuse to seat.
Now inspect the hardware itself. A bent or split insertion pin, a damaged retaining box or torn fabric around either fitting is a more serious matter than a moment’s poor alignment.
For moulded plastic-tooth zips, Patagonia and iFixit identify missing or damaged bottom fittings as faults requiring replacement of the complete zip for a permanent repair. Other constructions may have specialist repair possibilities, but I would leave those to somebody who can assess the actual fastening.
At the opposite end is the top stop: the small metal or moulded fitting that prevents the slider travelling off the end of the teeth.
Without a functioning top stop, you can pull the slider right off the zip. It is a tiny component with an unusually important responsibility.
A missing stop is often repairable without replacing the entire fastening. The replacement must suit the zip and be secured properly to the tape. Merely pushing the slider back on and hoping it remembers where to stop is not a lasting solution.
What is worth fixing at home, and what belongs in an alterations shop?
I am perfectly happy doing a small repair when I understand the fault and can see how the remedy works. I become considerably less enthusiastic when the instructions begin requiring faith in parts I cannot identify.
For zip repairs, I would divide the jobs according to what you have to disturb.
Reasonable home jobs include carefully freeing caught fabric, brushing away dirt, checking that the insertion pin is seated properly and testing whether a locking slider holds with its pull tab lowered.
Replacing a slider is more involved, although it need not mean replacing the entire zip.
The new slider must be compatible with the zip’s construction and size. A slider intended for a metal-tooth zip is not automatically interchangeable with one for a coil or moulded plastic-tooth zip, even when they look roughly alike.
Patagonia’s repair instructions describe removing the appropriate top stop, sliding the old component off, fitting the correctly matched replacement in the same orientation and attaching a new stop securely. The replacement is tested before the stop is refitted.
That is a legitimate DIY job where the zip is suitable, the correct parts are available and the reader can follow the complete instructions. It is also entirely reasonable to hand it to an alterations shop. Do not remove a stop from a jacket whose construction you cannot confidently put back together.
Professional assessment is the better route when teeth are missing or badly damaged, the zip tape is torn, the lower separating fittings have failed or the fastening needs removing from the jacket.
Two-way separating zips, which have two sliders and can open from the bottom as well as the top, deserve particular care because their starting arrangement is different. I would not improvise a repair using instructions intended for an ordinary single-slider jacket zip.
A full zip replacement generally means removing the old fastening and sewing a new one into the jacket’s front opening. Depending on the construction, the repairer may have to deal with linings, facings and other layers to reach the original stitching.
That is why the price of the replacement zip alone tells you very little about the cost of the job.
If the jacket is otherwise good, ask for a quote. A sound leather jacket, a favourite winter coat or a particularly excellent second-hand find may justify work that would make less sense on something already wearing out everywhere else.
But I would want to know whether I was paying for a new slider or an entirely new zip before agreeing to either.
One last test when buying second-hand
I already inspect cloth, construction and fit in How to Buy a Second-Hand Wool Coat That Lasts. A zip fastening deserves its own brief examination.
Fasten it fully, open it and fasten it again. Check that the bottom engages properly, the teeth stay joined, and the slider remains where you leave it. Then move naturally in the jacket, particularly through the shoulders and chest, and watch for separation or slipping.
A fault you can identify is something you can price into the purchase, take to a repairer or decide to live with. A fault you haven’t bothered to test is waiting until you’ve left the shop to introduce itself.
Leave a Reply